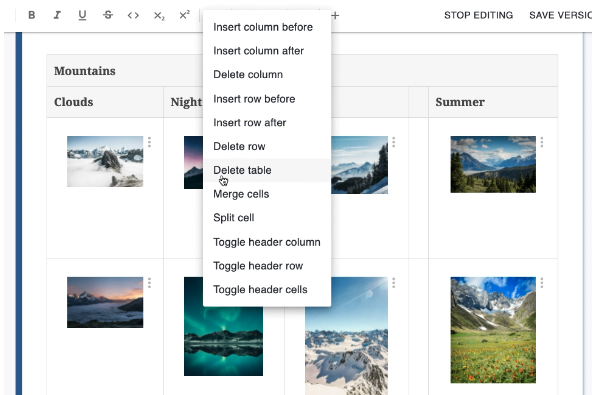
Tables can be added throughout your Curvenote content. After creating the standard table, you can format it by adding or removing rows, columns and headers. A variety of specialized content can be added within the cells of your table such as equations, lists, code blocks, images, links and more! Tables are easily converted to the necessary format when you export your content from Curvenote.
Video Demo 📺
Create a Table
While in Draft Mode for both your article and block, add a table using one of the following options:
- Open the Insert menu ➕ in the editing toolbar at the top of your page
- Select Table
- Using the command menu type
/table
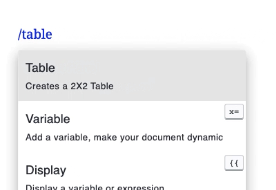
Table Formatting
You can adjust the formatting to create a table that meets your needs by adjusting the rows, columns, header formatting, and more.
Insert Rows or Columns
You can insert rows and columns anywhere in your table. To do this:
- Place your cursor in a cell in your table
- Use one of the following options
- Table Toolbar located at the bottom of the table
- Table Options located in the editing toolbar at the top of the page
- Command Menu - start typing
/inline
- Select one of the four insert options from your current cell
- Insert a row above
- Insert a row below
- Insert a column to the left
- Insert a column to the right
Delete Rows or Columns
You can also delete entire rows and columns from your table. To do this:
- Place your cursor in a cell in your table
- Use one of the following options
- Table Toolbar located at the bottom of the table
- Table Options located in the editing toolbar at the top of the page
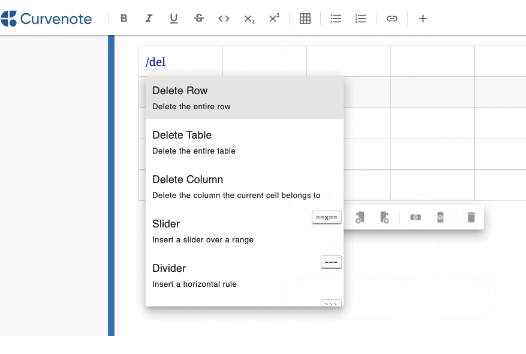
- Command Menu - start typing
/inline
- Select one of the two delete options from your current cell
- Delete a row
- Delete a column
Resize Columns
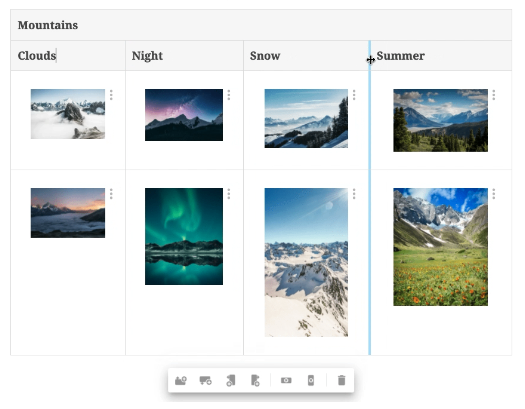
To adjust the width of a column:
- Hover over the line between columns
- The line with highlight blue and a sliding arrow will replace your cursor
- Click on the line and drag the column to your desired width
Header Formatting
When you create a table, the top row will automatically be formatted as a header with a grey background and bolded text. You can add or remove header formatting from rows, columns, and individual cells.
To update the header formatting of a row column or cell:
- Place your cursor in a cell in your table
- Use one of the following options
- Table Options located in the editing toolbar at the top of the page
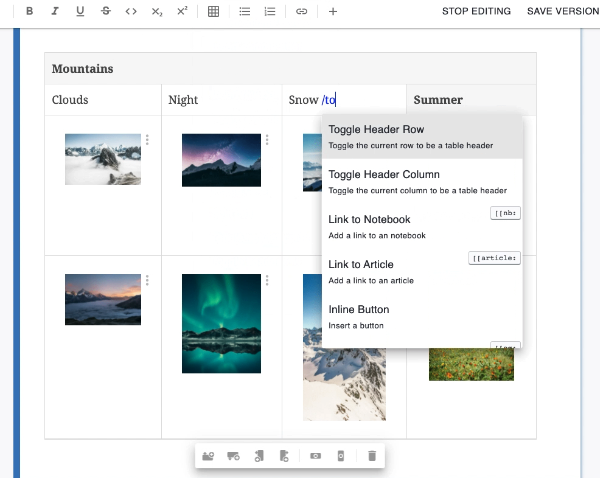
- Command Menu - start typing
/inline
- Select one of the three Toggle Header options
- Toggle header column
- Toggle header row
- Toggle head cell
Merge & Split
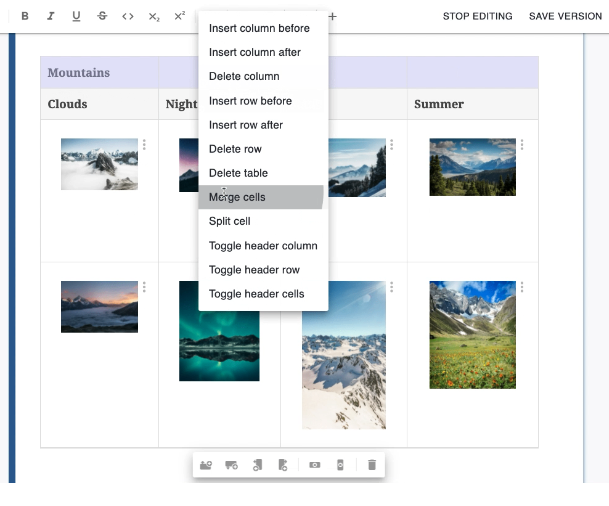
Cells within a table can be merged. Cells that were previously merged can be split.
To merge multiple cells:
- Highlight and select the cells you want to merge
- Click on the Table Options icon in the editing toolbar
- Select Merge Cells
To split cells that were previously:
- Highlight and select the cells you want to split
- Click on the Table Options icon in the editing toolbar
- Select Split Cells
Delete a Table
Tables can be deleted while in edit mode for both your article and block. To delete a table:
- Place your cursor in a cell in your table
- Use one of the following options
- Table Toolbar located at the bottom of the table
- Table Options located in the editing toolbar at the top of the page
- Command Menu - start typing
/inline
- Select the trashcan icon 🗑️ or Delete Table option
