How to use Paperpile with Curvenote
A simple guide
Suzanne O'Regan, Ivaylo Sakelariev · November 25, 2022
The need for interactive and explorable content has changed scientific publishing significantly in the last 20 years. The Jupyter project is one of the main advances in the production of “living” scientific documents. Jupyter Notebooks are one of the most popular computational notebook formats among academic researchers and data scientists.
Curvenote is a tool for scientific writing and publishing that integrates directly with Jupyter notebooks. One of Curvenote’s many strengths is its easy-to-use reference management. References can be uploaded as a BibTeX (.bib) file, a structured format that stores bibliographic information.
But, how do you quickly create a BibTeX file containing your references for your Curvenote project? Paperpile offers two solutions to this problem—one simple, and one that is a bit more technical.
Easily search through your Paperpile references directly when you are writing in Curvenote!
But first, what is Paperpile?
Paperpile is a web-based reference management tool that offers BibTeX support and dynamic integration with external platforms. You can collect, store, and organize your references, all in one app. Reference lists can be easily exported to .bib files.
With Paperpile, you can:
Collect references fast. You can search across major databases like Google Scholar and ArXiv, or use the browser extension to get the PDF and accurate metadata in just one click;
Organize your research library using folders and labels. Folders provide hierarchical structure, whereas labels offer a more flexible method for grouping papers;
View and annotate PDFs;
Customize BibTeX output.
In this tutorial, we’ll show you how to create a .bib file for your Curvenote project in two ways so that you can benefit from all the conveniences of Paperpile.
The first way shows you how to generate a static BibTeX file using Paperpile that can be uploaded to the Curvenote web app, but the file needs to be manually updated each time you change or add new references.
The second way requires you to install the Curvenote CLI and creates a dynamic integration between Paperpile and Curvenote.
We describe both use-cases through simple step-by-step guides. But first, we show you how to collect and organize your references in Paperpile.
Managing your references with Paperpile
To organize your papers, we recommend only including the references that you need for your Curvenote project, and using the full reference management capabilities of Paperpile. This is easy to do by creating a folder that contains all the references for your project.
To create a new folder in Paperpile, follow these steps:
In the left-hand toolbar in the Paperpile web app, go to FOLDERS > click the plus symbol Add new folder
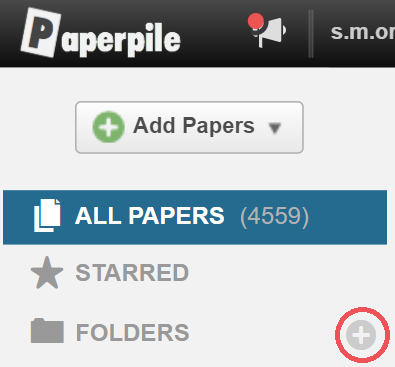
In your folders, click the plus symbol to add a new folder.
Name your new folder, and click Create Folder
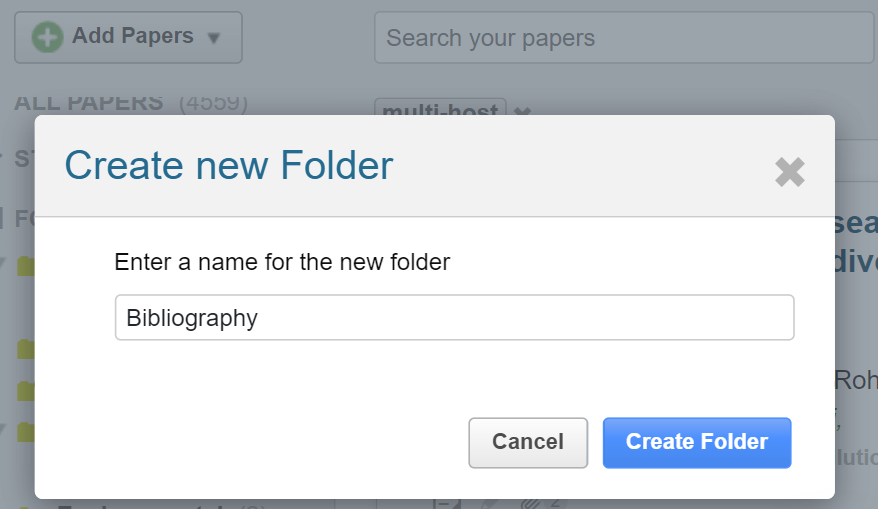
Name and create a new folder in Paperpile.
Add references to your folder. You can add papers by searching online, uploading PDFs, BibTeX or other files, browsing online databases, or by manual input of citations. References can also be collected using the Paperpile browser extension.
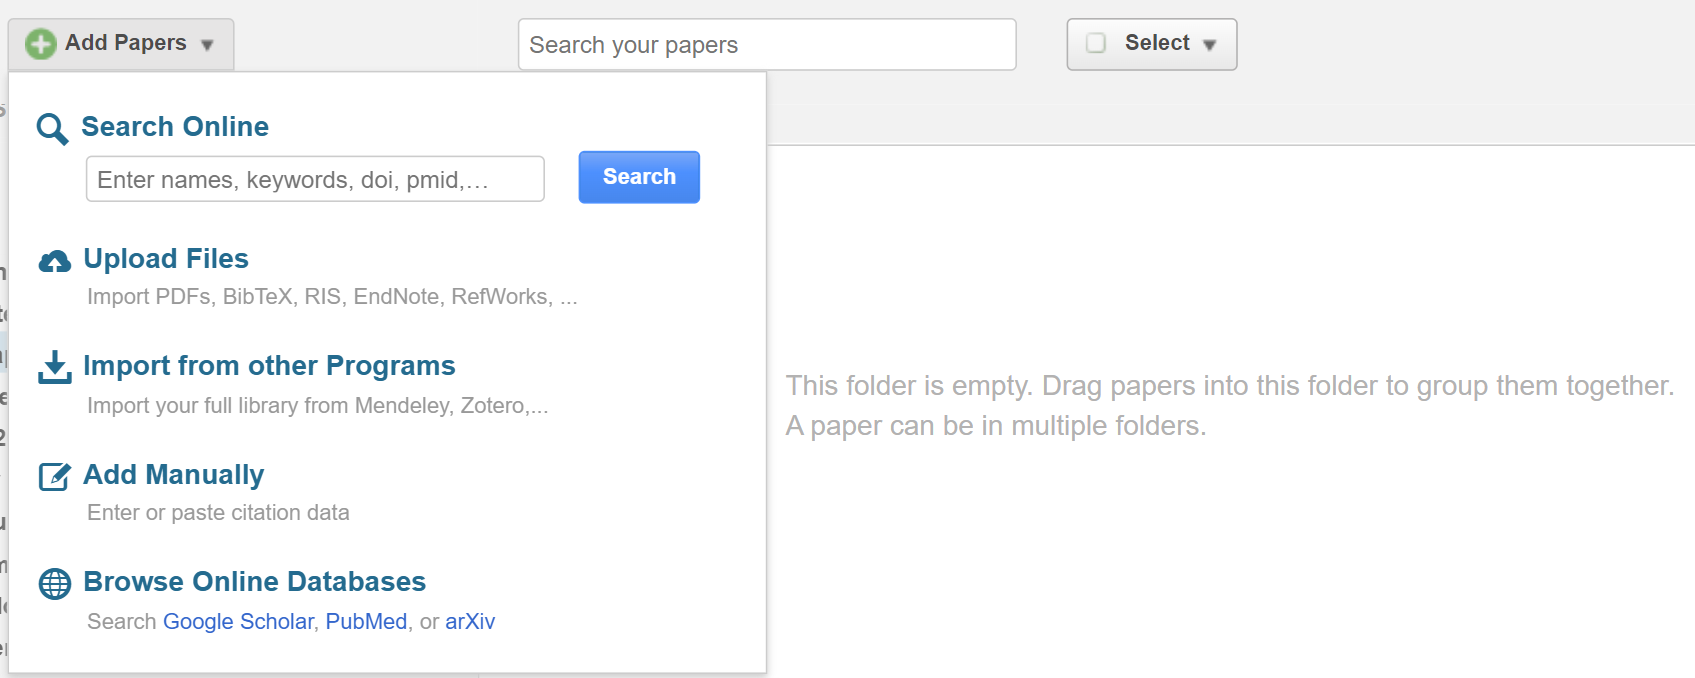
Add references to your new folder by uploading PDFs.


Now, your references are organized in a folder, where you can order your papers hierarchically using subfolders, sort and filter papers by specific criteria, add notes to papers, and use the notes to generate paper summaries. Next, we show you two ways to add the references in your Paperpile folder to your Curvenote project.
A simple step-by-step guide to creating a BibTeX file for a Curvenote project in the web app
We describe how to export a BibTeX file from Paperpile and import it to the Curvenote web app in two steps:
Step 1: Export the BibTeX file to your desktop
To download the folder containing your references as a BibTeX file, select the downarrow next to the folder > Export > BibTeX

Download any Paperpile folder as a BibTeX file.
Step 2: Import the BibTeX file to your Curvenote project
In the bottom-left corner of your project, click REFERENCE MANAGEMENT
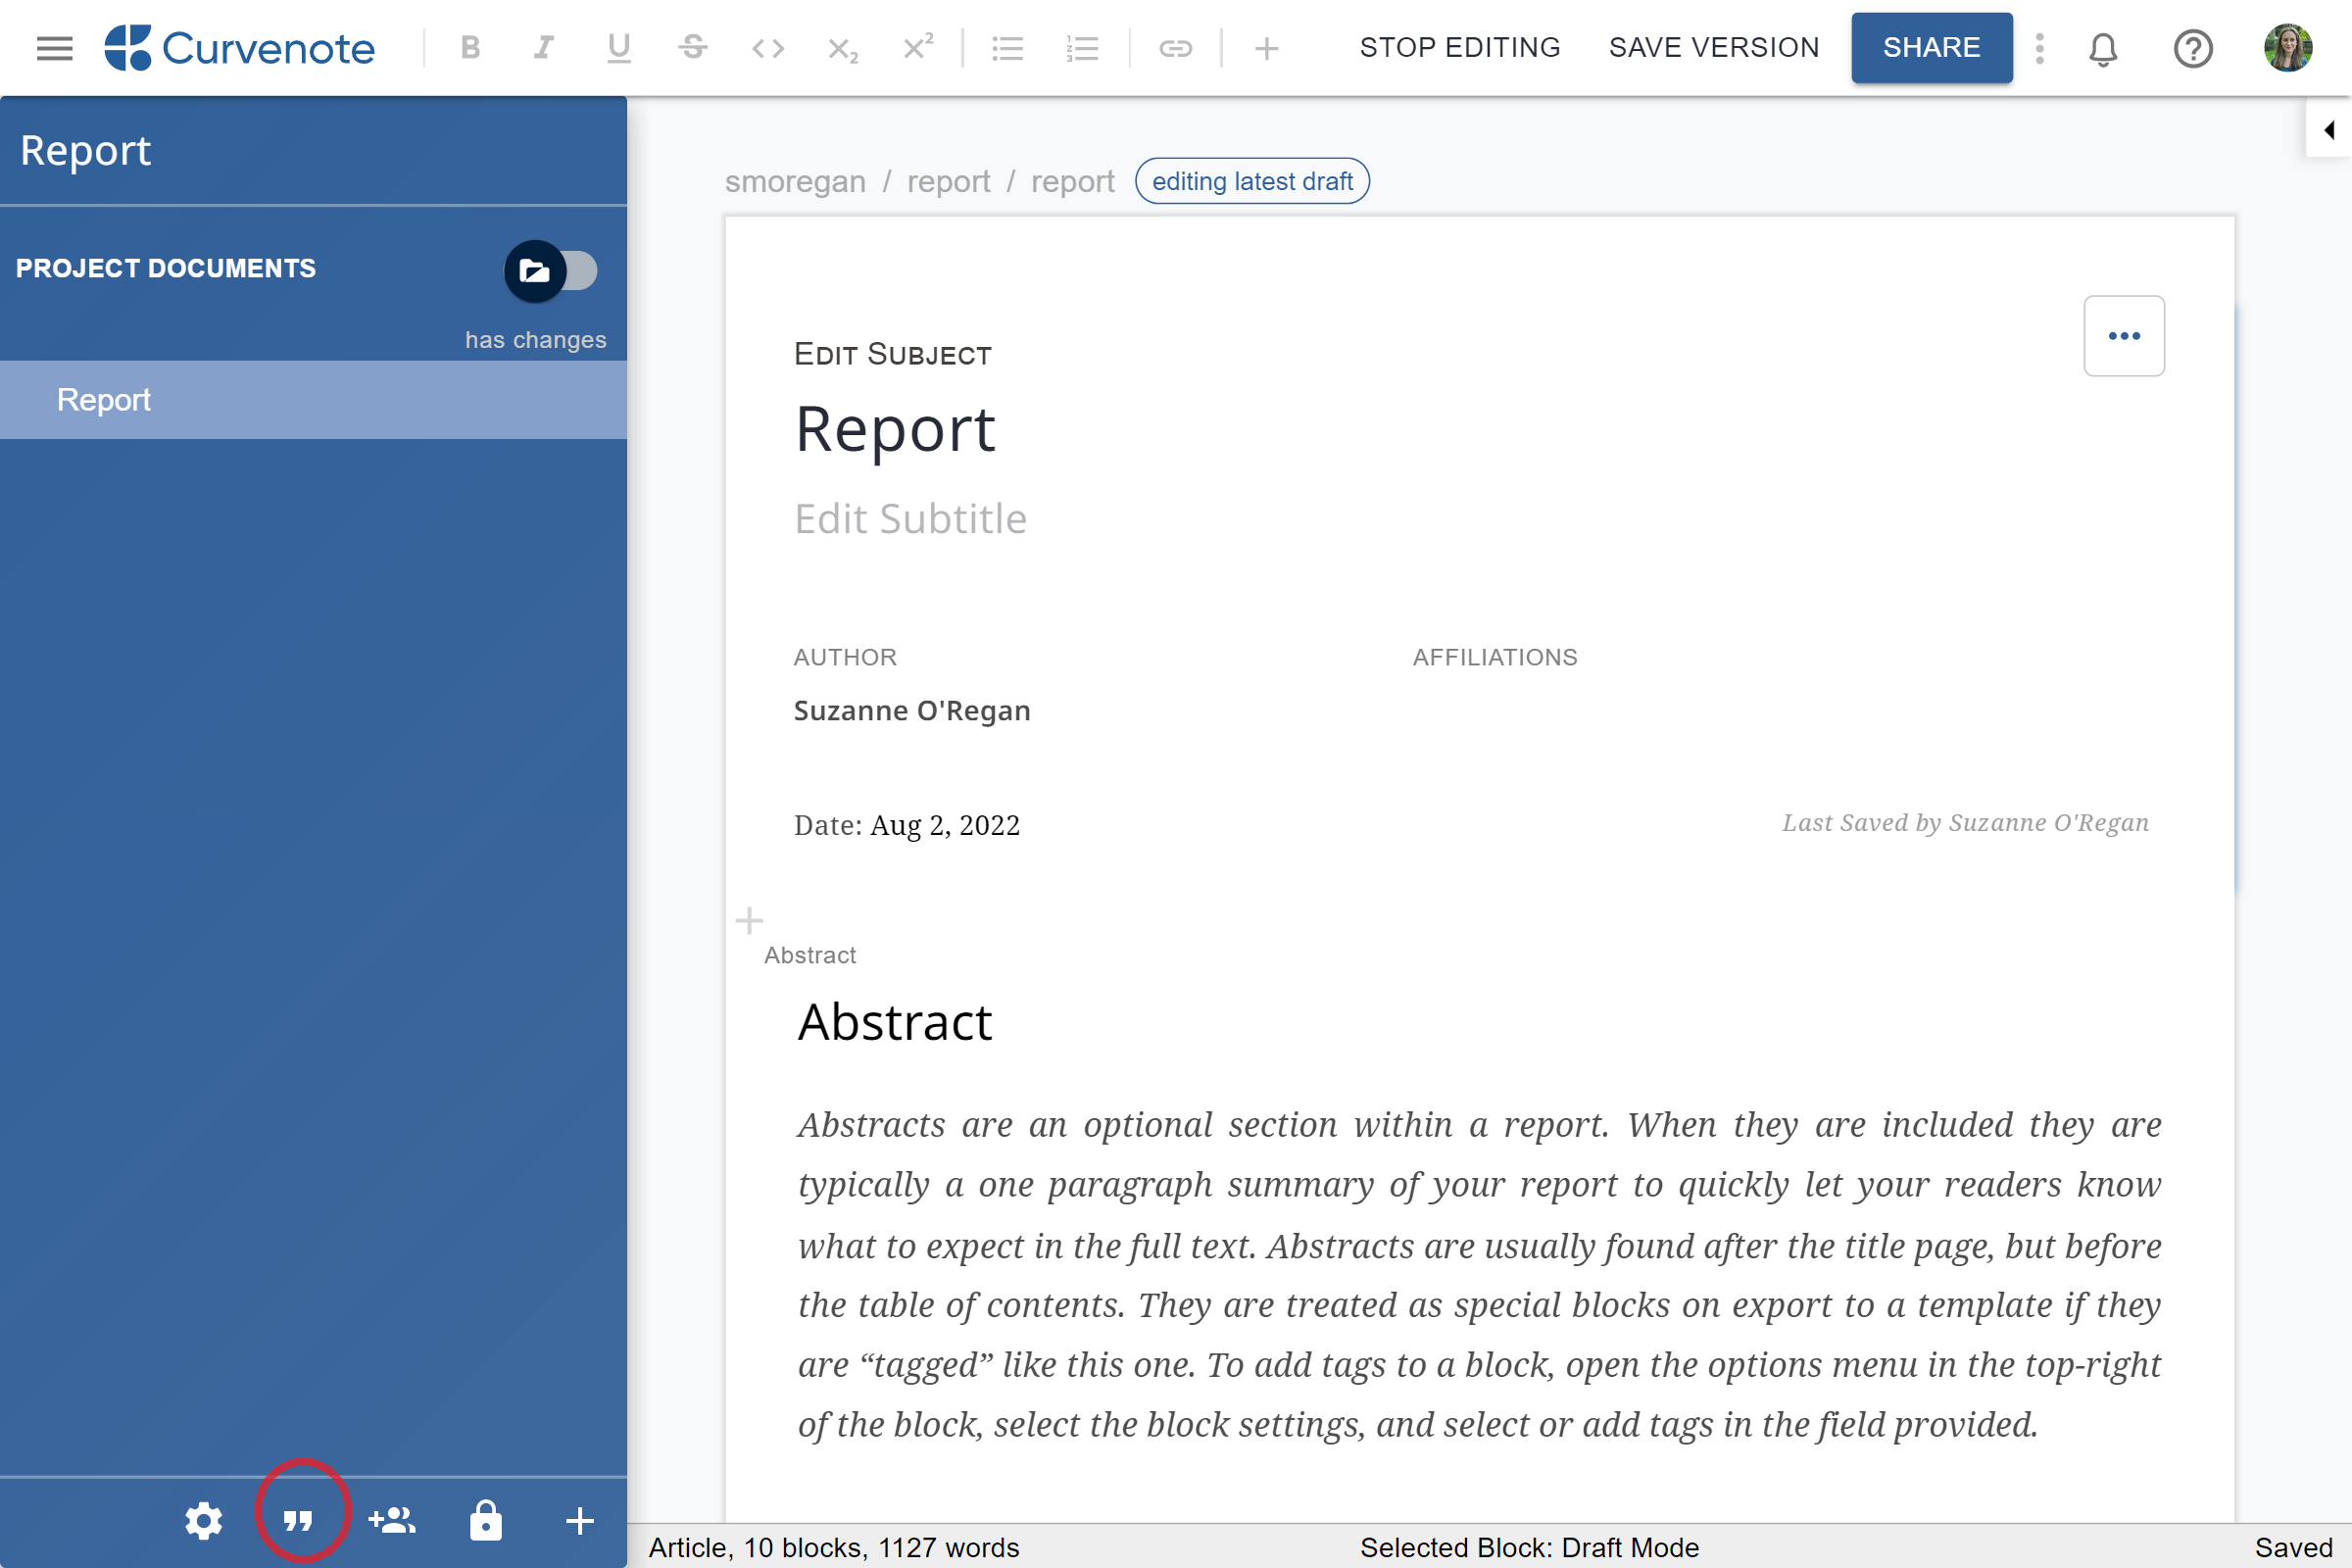
Easily import references in Curvenote using the Reference Management tool.
Click UPLOAD BIBTEX to add the BibTeX (
.bib) file to your project: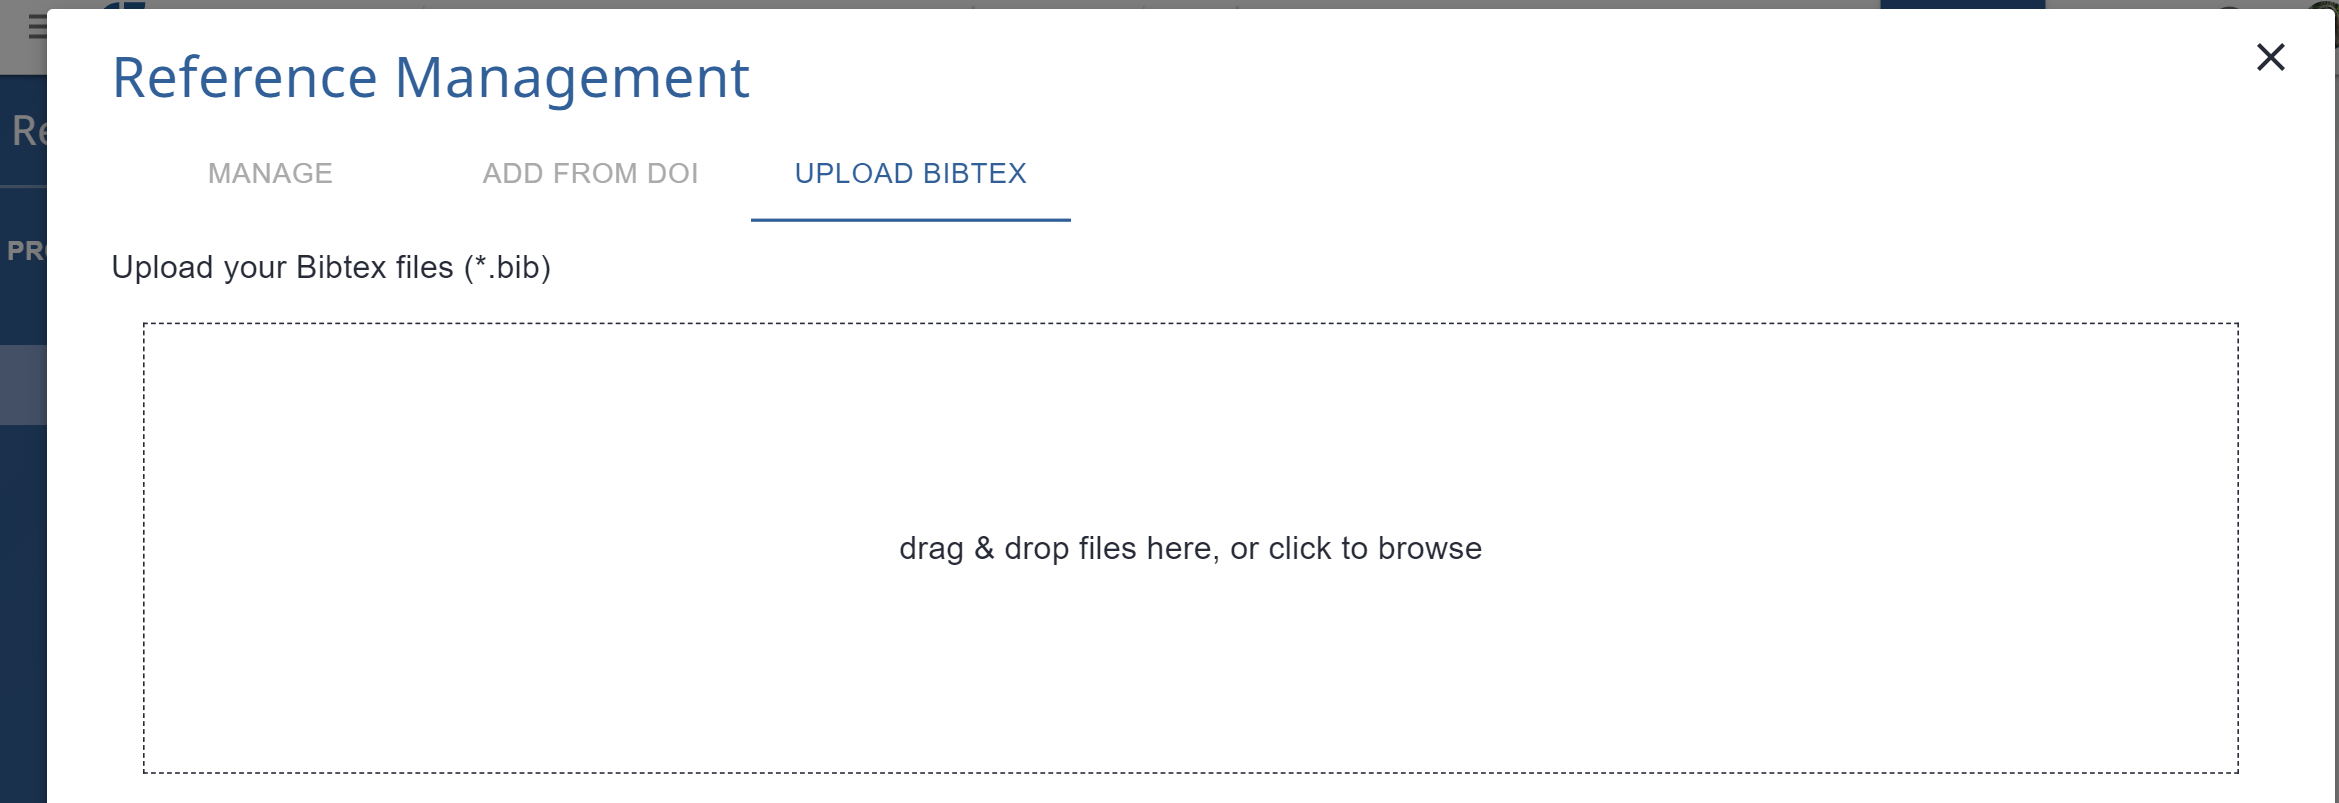
Upload your BibTeX references to Curvenote.
Now anyone writing with you can easily use these references in the project using the
[[cite:prompt in Curvenote. Keep typing to search through your references dynamically, Curvenote will keep access to all sorts of metadata, including the abstract and DOI.Search through your references as you are writing, and easily add your Paperpile references into your Curvenote articles.


Updating your reference list in Curvenote is simple. Just add or edit a reference to your Paperpile folder, then repeat steps 1 and 2 above. The new item will be integrated seamlessly into your references in the Curvenote web app as well as when you export to Microsoft Word, LaTeX, or PDF using Curvenote’s professional templates.
Steps 1 and 2 offer a quick and easy way of creating a reference list for your Curvenote project in the web app. However, if you prefer to work locally with Markdown and/or use the collaborative capabilities of GitHub, and would like your reference list in Curvenote to automatically update when you add a reference to Paperpile, read on!
A step-by-step guide to synchronizing references with the Curvenote CLI and the Paperpile Export workflow (GitHub or a live link)
We describe how to set up Paperpile’s BibTeX Export workflow to Curvenote in three steps:
Step 1: Clone your Curvenote project locally
Install the Curvenote CLI with
npm install -g curvenote, detailed instructions are here.You can either choose to work with your Markdown (
.md) or Jupyter Notebook (.ipynb) files from an existing Curvenote project or work with a GitHub repository locally. In this use-case, we clone a git repository:git clone https://github.com/sakelariev/curvenote.git blog Cloning into 'blog'...Go to the folder that you have created using
cd <name_of_folder>(cd blogin our example) and typecurvenote initto create a local website of your project.1 2 3 4 5 6 7 8 9 10 11 12 13 14 15 16 17 18> curvenote init Welcome to the Curvenote CLI!! 👋 curvenote init walks you through creating a curvenote.yml file. You can use this client library to: - sync content to & from Curvenote - build & export professional PDFs - create a local website & deploy to https://sakelariev.curve.space Find out more here: https://curvenote.com/docs/cli ? What content would you like to use? Import from Curvenote ❯ Use the content & notebooks in this folder - Show me some demo content! (Disabled)Select
Use the content & notebooks in this folder. Use the ↕️ arrow keys to change the selection.Choose the title of your project/site.
? What is the title of this project? (blog) blogStart Curvenote to show a preview of your content locally by typing
Y. You can also usecurvenote startlater to restart the server, this will bring up your content on a local website.1 2 3 4 5 6 7 8 9 10 11 12 13 14 15 16 17 18 19Curvenote setup is complete!! 🚀 You can use this client library to: - curvenote pull: Update your content to what is on https://curvenote.com - curvenote start: Start a local web server now! - curvenote deploy: Share content on https://sakelariev.curve.space Find out more here: https://curvenote.com/docs/cli ? Would you like to start a local server now? (Y/n) Y ✨✨✨ Starting Curvenote ✨✨✨ 🚀 Built in 842ms 🔌 Server started on port 3000! 🥳 🎉 👉 http://localhost:3000 👈
Step 2: Set up the BibTeX Export workflow in Paperpile
Login to Paperpile and create a folder with the references that you’d like to export (see Managing your references with Paperpile above!)
Click on the arrow next to the folder and select Connect to Workflow.
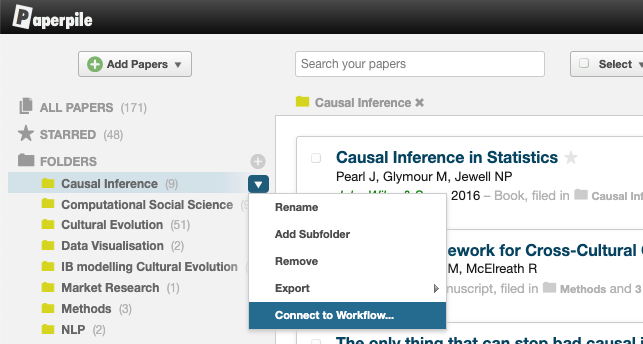
Connect to workflow in Paperpile.
Go to BibTeX Export and click +Add.
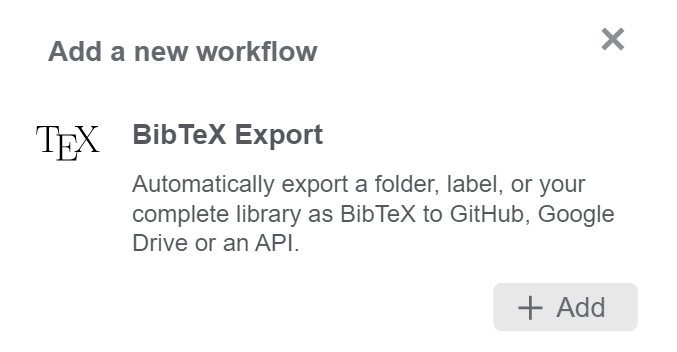
Create a BibTeX export workflow in Paperpile.
Select GitHub, add the name of your repository and choose a name for the
.bibfile that you’d like to sync with the repository (see Paperpile’s GitHub documentation)Authorize the paperpile-bot to push your
.bibfile to the GitHub repository. Follow the instructions on the screen to add the paperpile-bot as a collaborator to the repository. Ensure that the paperpile-bot has Write permissions (permissions can be changed under Settings > Access > Collaborators and teams in GitHub).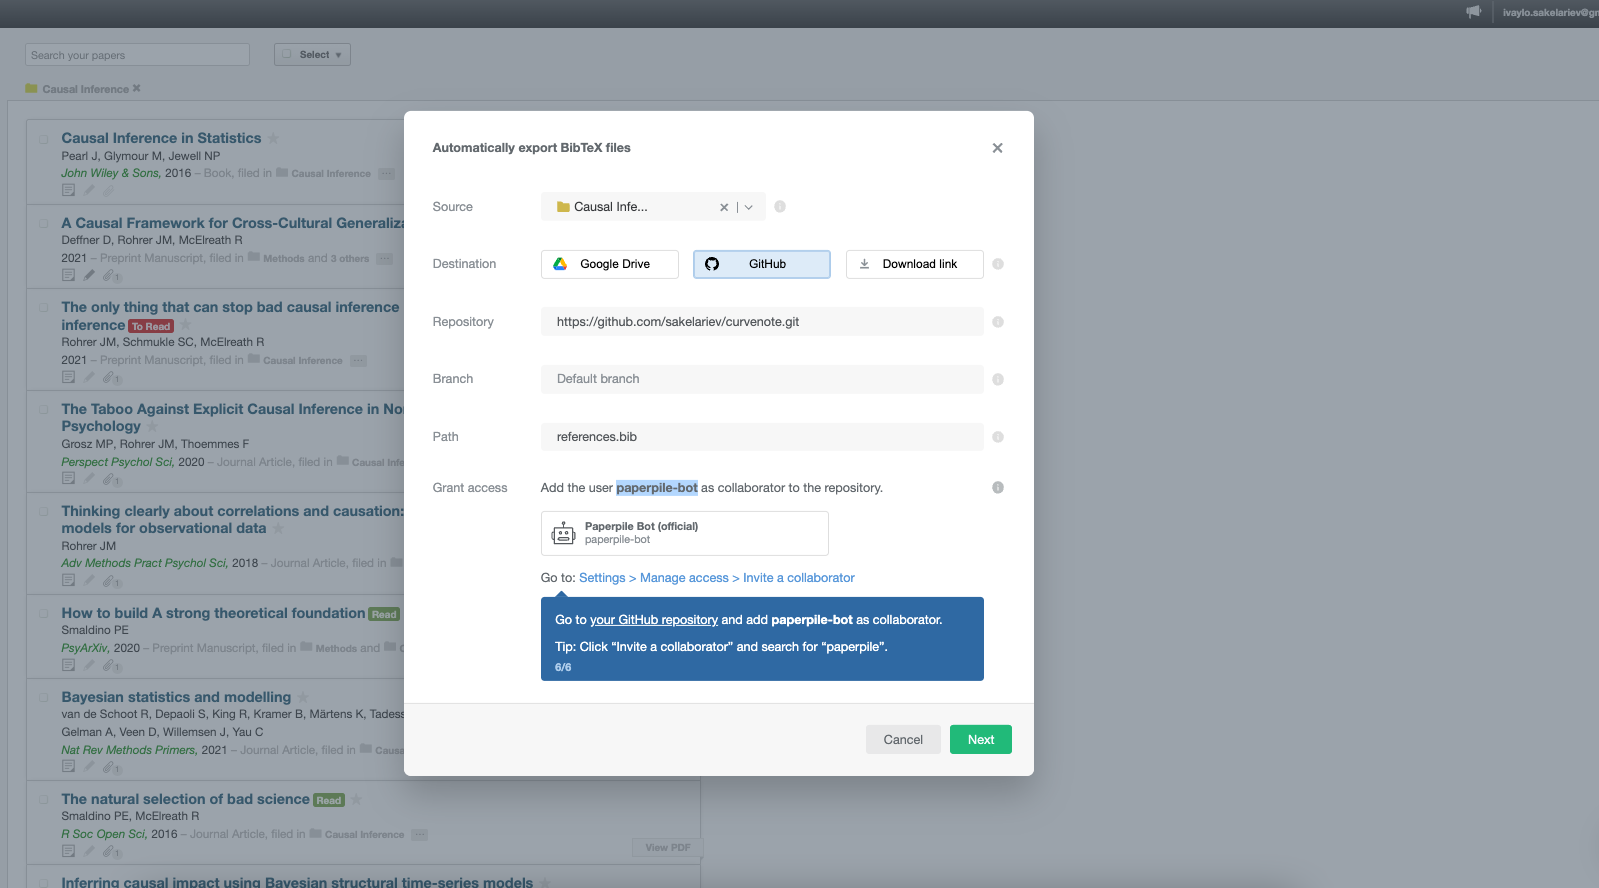
Activate the paperpile-bot in GitHub.


Alternative: Use live link
An alternative to pushing a BibTeX file to a GitHub repository is to export to a live link. The link works in the same way as the GitHub workflow, in that it will be updated when any changes to the folder associated with the workflow are made, but without the version control of GitHub. To get the link, after selecting the BibTeX Export workflow, select the Download Link option, choose a name for the .bib file, and click Finish. Then copy the link.

Export to a live link.
Step 3: Import the BibTeX file to your Curvenote project
Return to your Curvenote project folder and open the
curvenote.ymlfile using a text editor. Underproject, add thebibliographyoption add the name of the.bibfile. (If you have chosen the live link option, instead of typing the name of the.bibinto the curvenote.yml file, copy the link from Paperpile’s BibTeX Export workflow, add the bibliography option to the .yml file, and paste the link there.)1 2 3 4 5 6 7 8 9 10version: 1 project: title: blog bibliography: - references.bib site: title: blog projects: - path: . slug: blogSave the
curvenote.ymlfile. On saving, Curvenote will rebuild your content automatically and you’ll see a new line of code with your references (🏫 Read 9 citations from references.bib).1 2 3 4 5 6 7 8🚀 Rebuilding... 🏫 Read 9 citations from references.bib in 39 ms. ⚙️ Writing site config.json 📖 Built my-first-notebook.ipynb in 16 ms. 📖 Built my-first-post.md in 152 ms. 📖 Built README.md in 17 ms. 📖 Built index.md in 18 ms. 📚 Built 4 pages for blog in 67 ms.Add citations directly in Markdown using
{cite:t}`citation_key`(see the MyST Markdown documentation on citations). BibTeX citation keys can be obtained from Paperpile (see the tips below).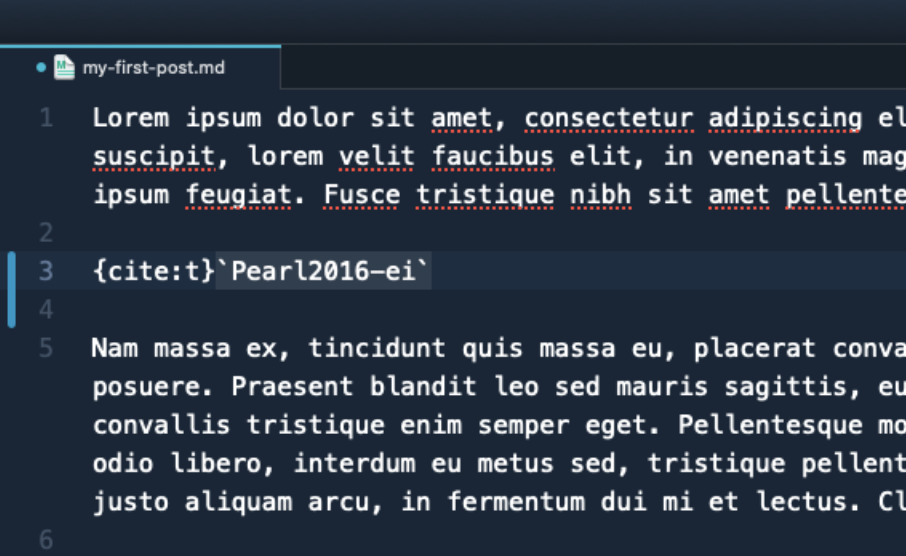
Create a citation in MyST Markdown.
This inserts your citation into the text and you also get a reference list at the bottom of the document. The citations are dynamic and expose metadata to ensure your scientific articles follow FAIR principles Wilkinson et al., 2016 (👈 you can click on the citation!).
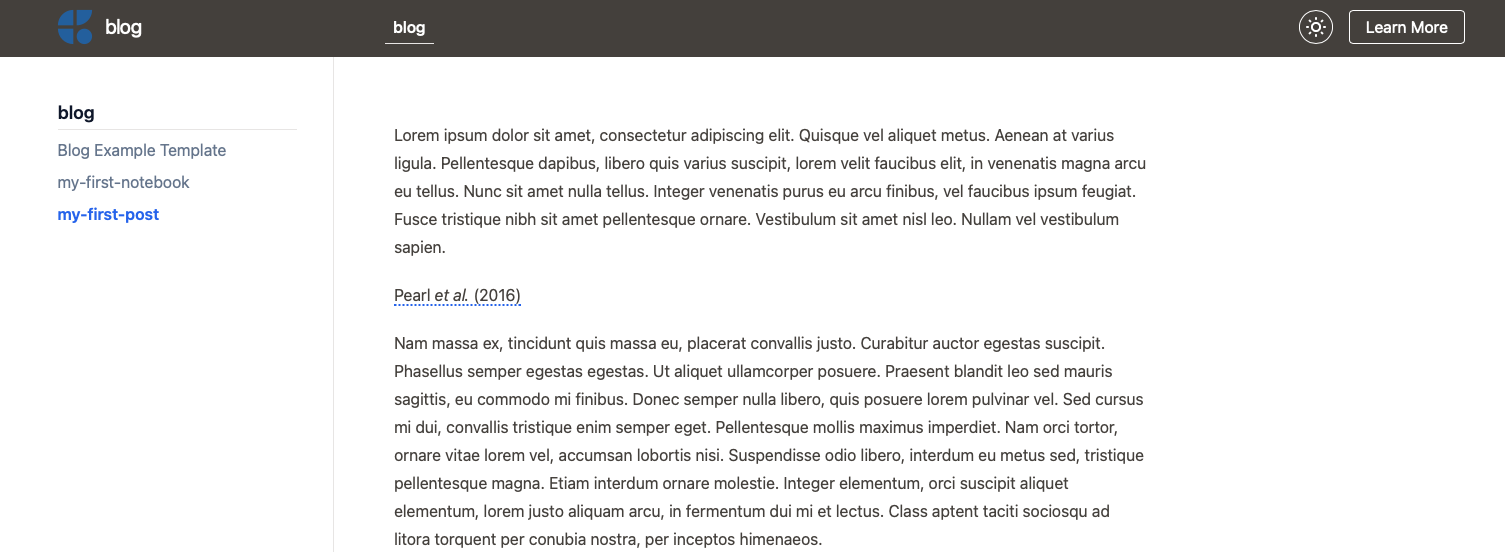
Rendered citations in your Curvenote site.


Now the best thing about Paperpile’s BibTeX Export workflow is that it is dynamic—every time you add a new reference to your Paperpile folder, you’ll be able to insert it as a citation to your Curvenote document given that you have fetched and pulled the latest changes locally. Once you have created a site with Curvenote, deploy your Curvenote site from GitHub or easily export your content to PDF, LaTeX or Word.
This makes the workflow really useful for collaborative projects where bibliographies need to be updated frequently—like journal club websites, or laboratory group webpages.
You can obtain a BibTeX citation key for any reference from Paperpile by selecting the reference, using Ctrl-B to copy the BibTeX item to the clipboard, and clicking View.
An alternative way to create a bibliography for your Curvenote project is to generate a reference list using a Paperpile label. Labels allow you to organize your references by topic, and they can also be exported as
.bibfiles, using the steps above.Have a complex project, like a thesis? You can add multiple Paperpile folders or labels to a Curvenote project in the web app. Simply generate a BibTeX file for each one and the references will be combined into one database in the Curvenote web app without duplication.
Need to export a bibliography from the Curvenote web app and add the references to Paperpile? To export the BibTeX file from a Curvenote project, Click Download options > Export As > TEX. The
.bibfile will be included in the .zip file containing the LaTeX source files. Then upload the.bibfile to Paperpile by selecting Add papers > Upload files > Choose file(s).
Final thoughts
We hope you now understand the power of using Paperpile and Curvenote together to write your scientific papers. Get started with Paperpile today—try it free for 30 days. After the free trial, you can purchase a personal subscription, or buy a multi-user license for your group.