Curvenote allows you to easily publish content on the web as a fast, optimized site that preserves all interactive features in Curvenote, and can be hosted for free on a *.curve.space domain or on your own custom domain.
In this tutorial we will:
- Prepare content to publish in a local folder, which may also be a git repository
- initialize a Curvenote site in that local folder
- edit the files locally and see live updates; and
- deploy that to a new website hosted at
https://username.curve.space
Create a folder containing content
In this tutorial, we will create a scientific website using local content. We will see how you can initialize a site, customize features and edit content locally whilst previewing changes in a local web server, before deploying the site directly from your computer.
🛠️ The first step is to create a new, or identify an existing, folder to contain all the local content and configuration files from your site and cd into it:
% git clone https://github.com/curvenote/docs-blog-template blog
Cloning into 'blog'...
remote: Enumerating objects: 60, done.
remote: Counting objects: 100% (6/6), done.
remote: Compressing objects: 100% (4/4), done.
remote: Total 60 (delta 0), reused 4 (delta 0), pack-reused 54
Receiving objects: 100% (60/60), 20.30 MiB | 9.82 MiB/s, done.
Resolving deltas: 100% (18/18), done.
% cd blog
Your website is built from content in the form of Markdown .md files and Jupyter Notebooks .ipynb. In this example, we have both in our local folder, as well as an image (used in index.md) and a logo that I want to use for my blog.
blog/
	images/
  		hackathon2019.jpg
	blo-logo.svg
	index.md
	my-first-post.md
my-first.notebook.ipynbInitialize a Curvenote site
🛠️ From within your blog folder, run curvenote init to start an interactive command line that will guide you through the initial setup of your site.
Welcome to the Curvenote CLI!! 👋

curvenote init walks you through creating a curvenote.yml file.

You can use this client library to:

 - sync content to & from Curvenote
 - build & export professional PDFs
 - create a local website & deploy to https://your.curve.space

Find out more here:
https://curvenote.com/docs/cli

? What content would you like to use?
  Import from Curvenote
❯ Use the content & notebooks in this folder
  - Show me some demo content! (Disabled)
🛠️ Select Use the content & notebooks in this folder. Use the ↕️ arrow keys to change the selection.
? What is the title of this project? (blog) My Blog🛠️ Next, you will be presented with an option to choose the title of your project/site.
The title will appear in web browser tabs, metadata, and navigation menus. This title, and any other setting, can be modified later by editing the curvenote.yml file produced in this step.
This will initialize the folder and give you some tips on how to add new content in future, before prompting you to start a local web server.
Curvenote setup is complete!! 🚀

You can use this client library to:

  - curvenote pull: Update your content to what is on https://curvenote.com
  - curvenote start: Start a local web server now!
  - curvenote deploy: Share content on https://your.curve.space

Find out more here:
https://curvenote.com/docs/cli


? Would you like to start a local server now? (Y/n)
🛠️ Go ahead and answer Y or hit Enter, your content will be processed, your site built and a local web server will start up.
? Would you like to start the curve.space local server now? Yes

Starting local server with:  curvenote start
🌎 Cloning Curvenote
⤵️  Installing libraries
⚙️  Writing site config.json


        ✨✨✨  Starting Curvenote  ✨✨✨


⚡️ Compiled in 356ms.
🚀 Built in 398ms

🔌 Server started on port 3000!🥳 🎉


        👉  http://localhost:3000  👈
This command can take a few seconds to complete, or longer if you have a large amount of content to process.
🛠️ Next, visit http://localhost:3000 to view the website in your local browser.
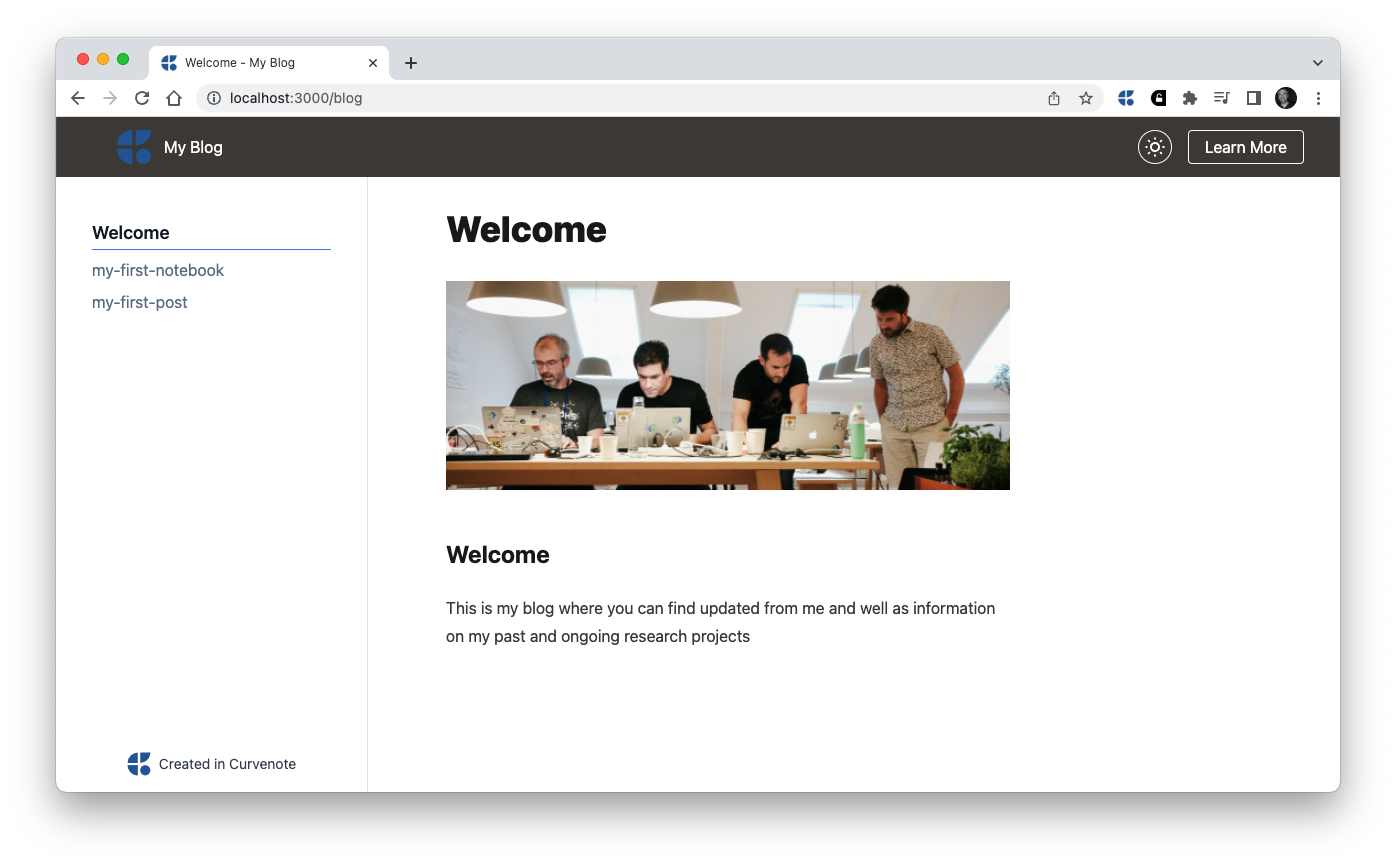
The example site in this tutorial only has three pages and by default looks like this:

Folder Structure
We can now look back at the local folder containing our site, which the Curvenote CLI has now populated with additional files and folders:
blog/
	_build/*
    public/
    	logo.svg
	images/
  		hackathon2019.jpg
	blog-logo.svg
	index.md
	my-first-post.md
	my-first.notebook.ipynb
The additions are:
curvenote.yml- the configuration file for your site_build- the folder containing the processed content and other site assets, which are used by the local web server. You should not need to touch anything in this folder. Should you delete the folder at any point runningcurvenote start -fwill rebuild it.public- a folder where you can place static assets that you want to include in the site
If we open and look inside our curvenote.yml we will see a basic configuration like this:
version: 1
site:
  title: My Blog
  domains:
    - stevejpurves.curve.space
  logo: public/logo.svg
  logoText: My Blog
  nav: []
  actions:
    - title: Learn More
      url: https://docs.curvenote.com/web
  projects:
    - path: .
      slug: blog
  twitter: stevejpurves
project:
  title: My Blog
Making changes
There are three major areas of the site that we can change (1) the content in Markdown or Notebooks; (2) the table of contents and navigation (including actions); (3) the branding and theme. We will focus in this tutorial on adding frontmatter and making branding changes around the content that you already have and you can explore more in guides for Table of Contents, Navigation & Actions, Logo & Branding, and in Themes.
🛠️ For the live editing to work, ensure that the web server is running, if you have cancelled it you can bring it back up using curvenote start.
Custom Logo
The website comes with a Curvenote logo by default.
🛠️ To change that to a custom logo we can:
- delete
public/logo.svg - copy your updated logo (
blog-logo.svgin this example) into thepublicfolder - edit the
logo:field incurvenote.yml:6to readlogo: public/blog-logo.svg - refresh the website in your browser, if you need to
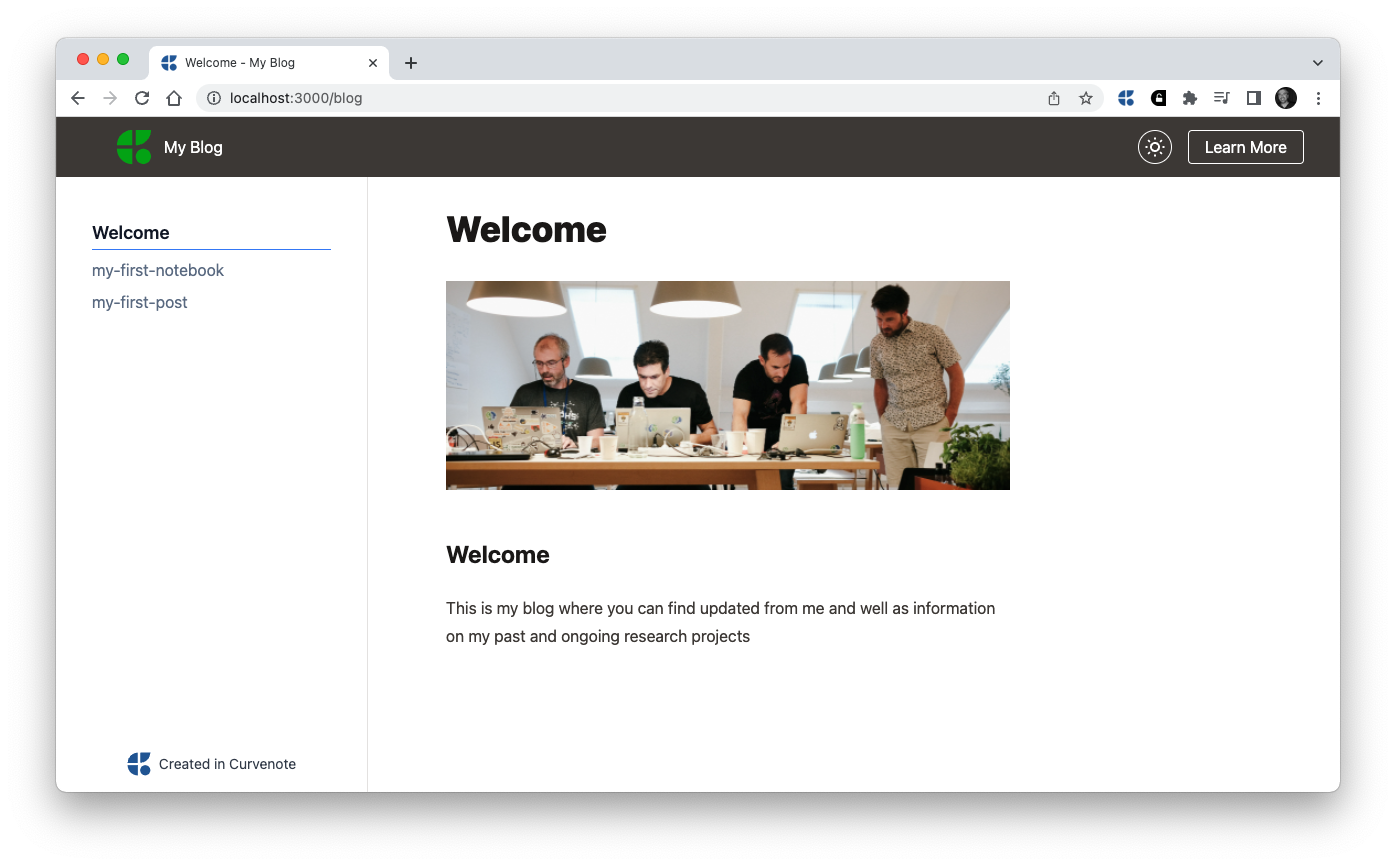
and you’ll see the custom logo (in this case a green Curvenote logo 😀) in the Navigation bar.

Changing Actions
Actions are buttons that appear on the right of the navigation bar and by default, a single “Learn More” action is added. See Navigation and actions to find out how to add, customize and remove actions.
Changing Page Titles
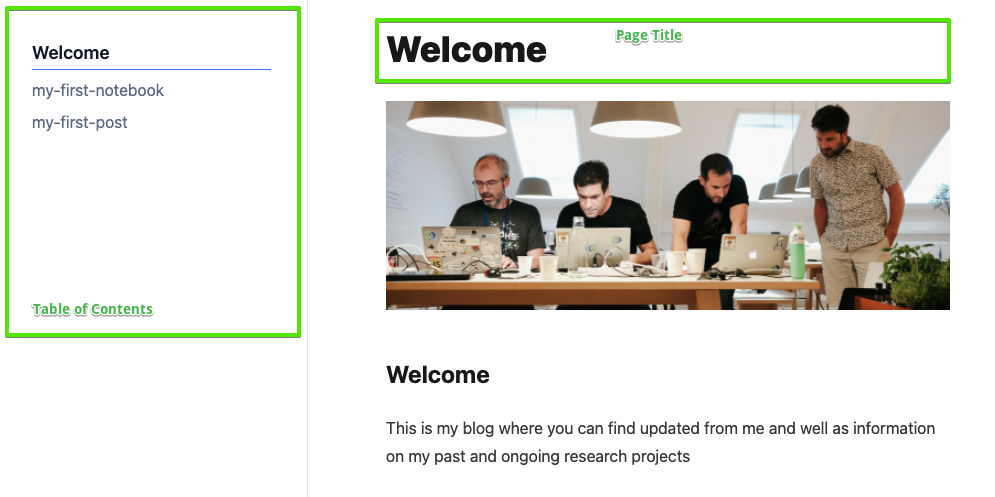
When building your site the Curvenote CLI tries to resolve the title for your page automatically for use in the Table of Contents and as the main Page Title.

In the example above, the index.md file contains a Heading with the text “Welcome” which has been used for the default page title. However, the other two files my-first-notebook.ipynb and my-first-post.md do not contain any markdown headings, so the filename has been used directly. We can modify these default choices to suit our needs by adding Frontmatter to our content files.
Frontmatter
Frontmatter is the name for the section of metadata that is included at the top of a content file. Unless you already use frontmatter in your markdown, there is probably no frontmatter section at all in your files yet.
It is easy to add one. Add a pair of lines with --- markers and in between include YAML formatted fields.
Markdown files
🛠️ In the example here, we’ll start with index.md and add the following to the top of the file:
---
title: The Blog
description: A blog about data engineering and analysis in science
authors:
  - name: Steve Purves
    orcid: 0000-0002-0760-5497
    corresponding: true
    email: steve@curvenote.com
    affiliations:
      - Curvenote
---
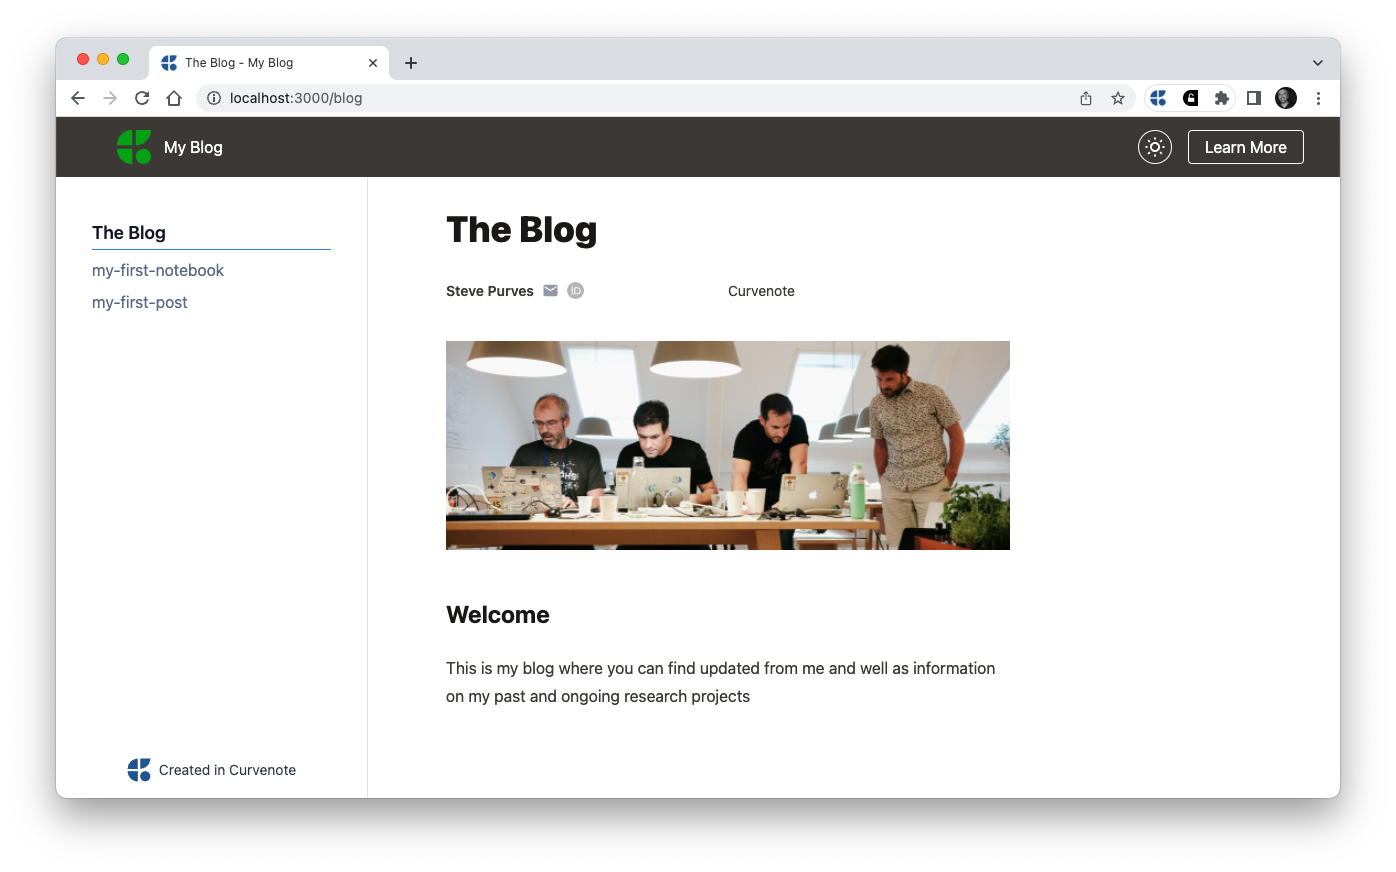
Once we save, the website will update and we’ll see the following changes and additions:

Note that, the title has been updated in the Table of contents as well as at the top of the page, and the author and affiliation also now appear in the page header. There is a growing number of options available, check Frontmatter for more details on them all.
Notebooks
The format of the Frontmatter section is the same in notebooks with one key difference being that we need to add an additional Markdown Cell as the first cell in our notebook and place the front matter section in there, complete with --- markers.
Whitespace matters, as this is YAML, and as long as the layout of the section looks ok when you are editing the cell, that will work. Once we render the cell, unfortunately, Jupyter, VSCode and other notebook renderers don't “yet” know how to display the frontmatter correctly, so it may look a mess.
Site-wide frontmatter
So we can add frontmatter to each of our files and be very precise about the metadata for each piece of content, which is great but some of this metadata can be common across our whole site (or sections of it, see Working with projects). Rather than duplicate the frontmatter in index.md in our other files, let’s instead move some of it to curvenote.yml where it will be applied to all content in our site.
🛠️ Open the curvenote.yml file for your site and locate the project: section. Add the authors information that we just added to the index.md file.
version: 1
site:
  title: My Blog
  domains:
    - stevejpurves.curve.space
  logo: public/blog-logo.svg
  logoText: My Blog
  nav: []
  actions:
    - title: Learn More
      url: https://curvenote.com/docs/web
  projects:
    - path: .
      slug: blog
  twitter: stevejpurves
project:
  title: My Blog
  authors:
    - name: Steve Purves
      orcid: 0000-0002-0760-5497
      corresponding: true
      email: steve@curvenote.com
      affiliations:
- Curvenote🛠️ Next, go back to index.md and remove the authors information from there, leaving only the following fields:
---
title: The Blog
description: A blog about data engineering and analysis in science
---
Ensure both files are saved and go back to your browser. You should see no change to the main page, it remains as before, complete with author and affiliation information.
🛠️ Next, check the other pages on the site which should now all show the project-wide author information!
This leaves us to add page specific metadata to the other pages on our site, such as title & description (see Frontmatter for the full list) as well as overriding the authors metadata on a specific page should we need to.
Deployment
Up until now, all of our site and changes have been local, next we are going to deploy our site to the internet so other people can see the interactive notebooks and reports we have made.
🛠️ To deploy, stop the local web server using ctrl+c then run curvenote deploy.
% curvenote deploy

? Deploy local content to "https://your.curve.space"? (y/N)
You’ll be shown the target URL for your site, which is based on your Curvenote username and the site.domains list in your curvenote.yml.
🛠️ Type Y or Enter to confirm the deployment, and your site will be uploaded and available in the next few seconds. 🚀
☁️ Uploading 27 files
 ████████████████████████████████████████ 100% | ETA: 0s | 27/27
☁️ Uploaded 27 files in 3.64 s.
🚀 Deployed 27 files in 2.08 s.
🕸 Site Deployed
🌎 https://your.curve.space
🎉 Congrats on deploying your first site! The site is wicked-fast, follows best practices for performance, accessibility, citations, metadata, SEO, and has a full API on all of the content to help make it FAIR Wilkinson , 2016. You can use this to help share your scientific work and the data and computations behind it.
Tracking with git
If you started out this tutorial in a git repository you should commit your site’s configuration files and keep those in version control alongside your content.
🛠️ Add _build/ to your .gitignore file so that the intermediate files are ignored
🛠️ Add and commit the curvenote.yml along with any other local changes to the file that you just deployed.
Next steps
So far you’ve deployed your content, with default settings and without additional configuration — find out how to customize your site by understanding the Local Folder Structure and checking the Configuration options.
- Wilkinson, M. D., Dumontier, M., Aalbersberg, Ij. J., Appleton, G., Axton, M., Baak, A., Blomberg, N., Boiten, J.-W., da Silva Santos, L. B., Bourne, P. E., Bouwman, J., Brookes, A. J., Clark, T., Crosas, M., Dillo, I., Dumon, O., Edmunds, S., Evelo, C. T., Finkers, R., … Mons, B. (2016). The FAIR Guiding Principles for scientific data management and stewardship. Scientific Data, 3(1). 10.1038/sdata.2016.18