Content on Curvenote is separated into distinct units called blocks. Blocks are individually versioned so you can easily switch between previous saved versions and track changes made by you and your collaborators. You can easily copy and import blocks across Curvenote projects. All copies of a block are linked, meaning if you save a version of a block in one location, that version is available for use in all other instances of the block. Blocks make it easy create sections of content, reuse your previous work, and work with collaborators!
What’s a block?
Blocks are groups of logically related content that can then be individually edited, saved, reused, and commented on. Your block can contain as much or as little content as you like, and can contain all types of content - including images, hyperlinks, interactive elements, videos, and more!
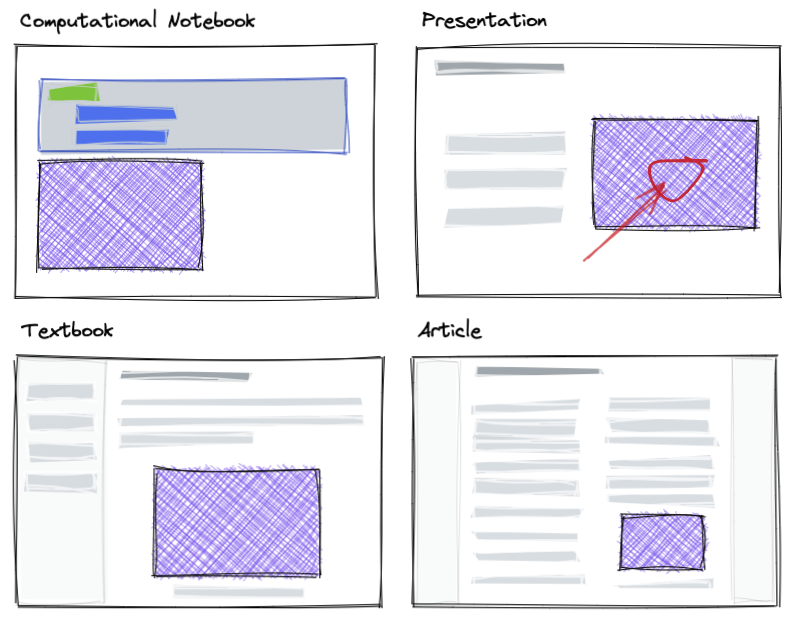
In Curvenote, almost everything is a “block”, including images, interactive Jupyter outputs, and sections of text. This modularity allows you to compose your content from existing pieces or even import blocks of content from another project. In Figure ?? we are showing the purple block that is an output from a Jupyter Notebook that can be brought into other documents. To read an article on how we think about version control and blocks see an article by Steve Purves. The rest of this article will focus on text blocks!
Version control systems allow people to work iteratively on content, code, and materials with the confidence that their work won’t be lost and that earlier work can be easily revisited and reproduced. Read an article on how we think about version control and blocks.

The purple block, a figure, is created in a computational notebook and subsequently copied into a presentation, textbook, and scientific article. In Curvenote these are connected, and an update to the figure propagates to other places that it is used.
Create a Block
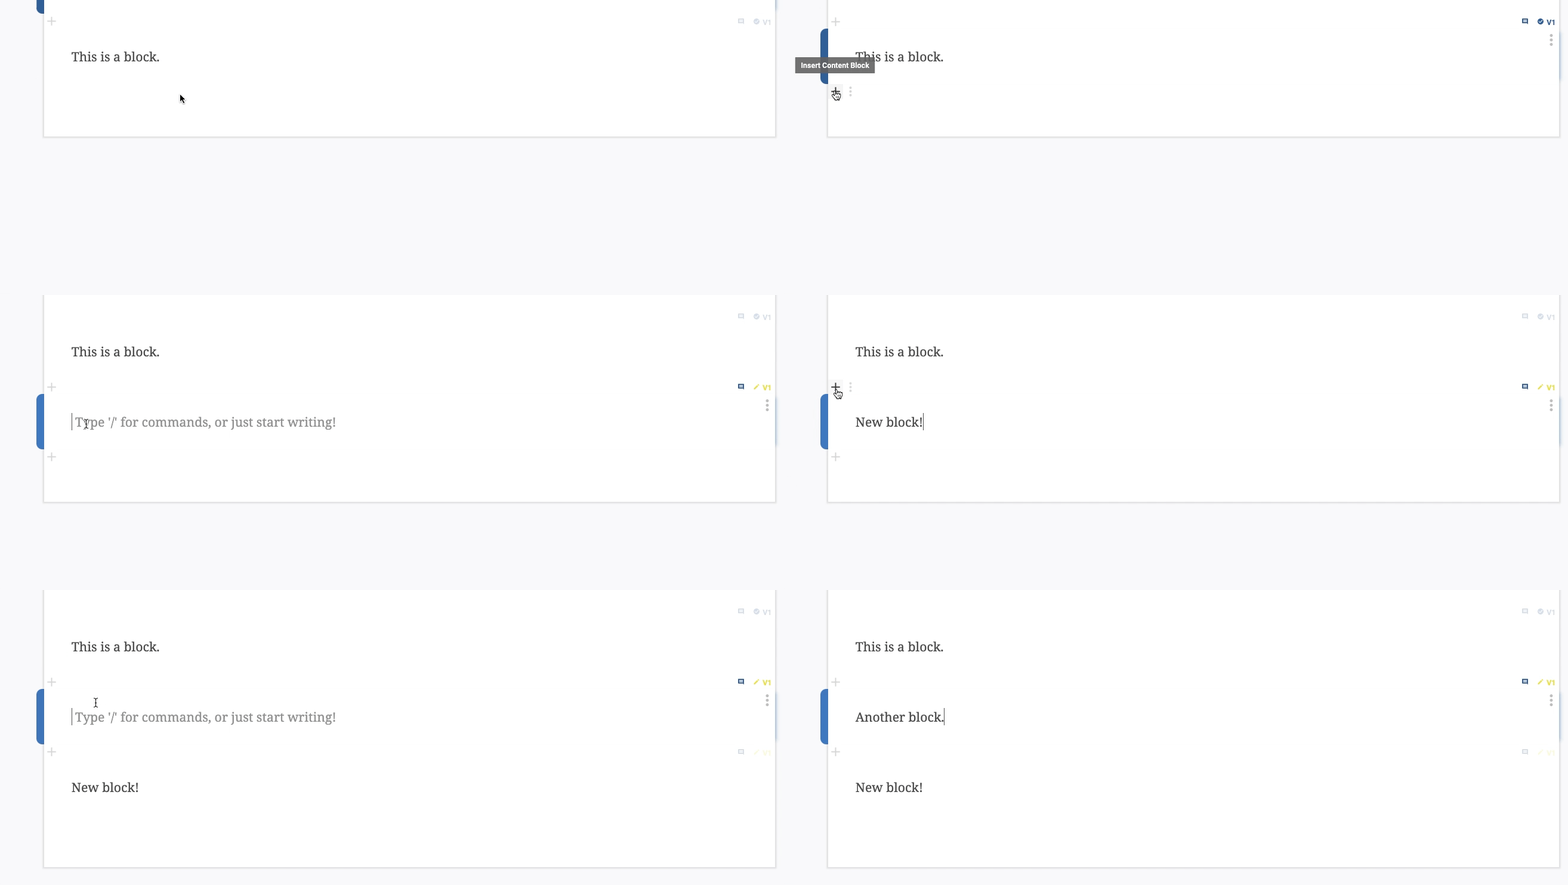
To create a block:
- You must be in Draft Mode for your article.
- If not, click EDIT in the app bar at the top of the page.
- Select the block you want to add a block above or below.
- Click the ➕ Insert Content Block corresponding to where you want to add a new block (above or below).
- The newly added block is a draft of the first version, and is automatically opened in Draft Mode.

Edit a Block
Similar to how you enter Draft Mode for an article, you must also open a draft version of a block to make changes. To edit a block in your article you must be in Draft Mode for your article (if not click EDIT at the top of the page). To open a draft version of your block either:
- Double click on the block.
- Select the block and hit ENTER.
- Open the block Options menu and select Edit.
You can now make changes to the block in a draft version. Learn more ➡️ Block Drafts and Versions
Settings
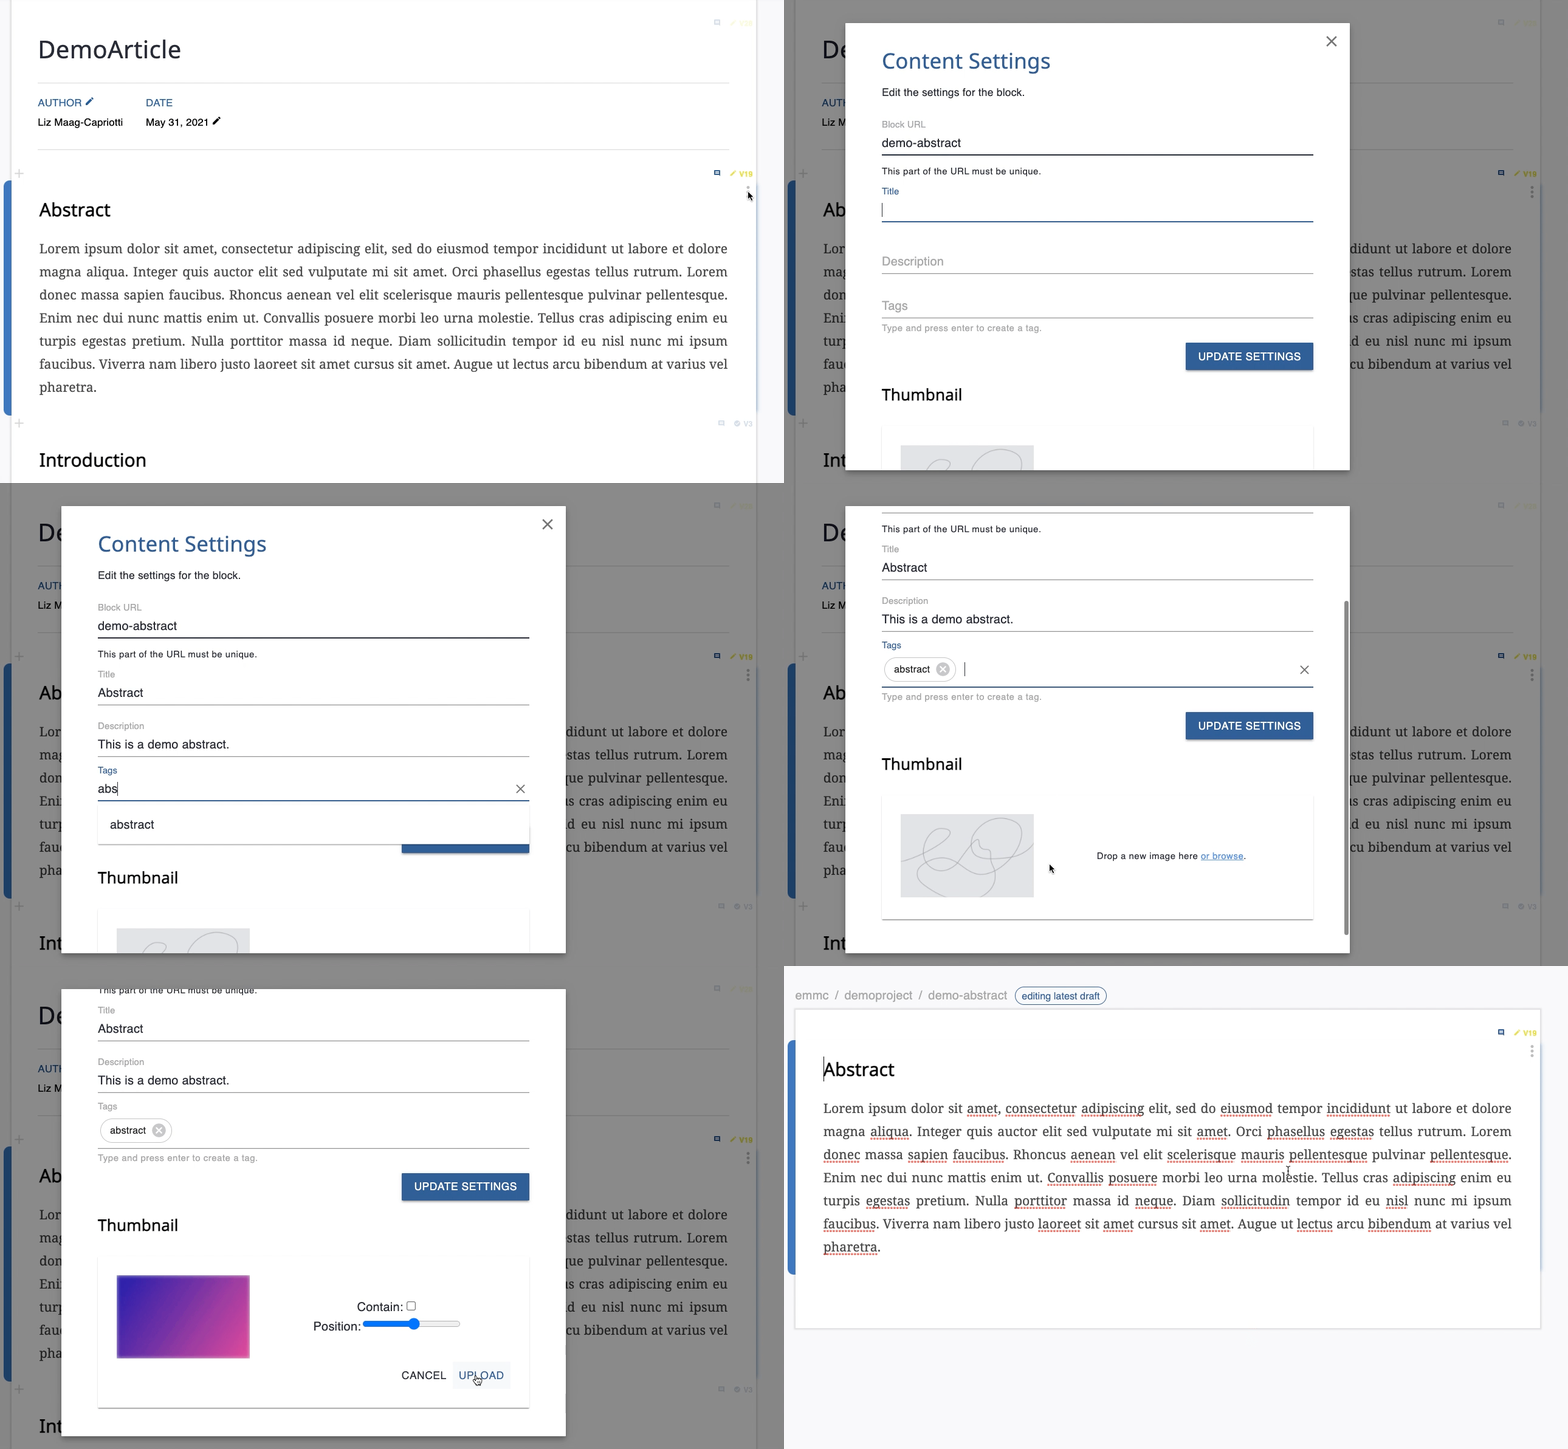
In some instances it’s beneficial to include additional information with a block. The block settings allow you to add or update the URL, title, description, tags, and thumbnail. Updating the block settings requires you to be in Draft Mode for your article and the block. To update the block settings:
- Open the block Options menu below the version number.
- Select ⚙️ Block Settings.
- Update the URL, title, description, and/or tags.
- To add a tag, hit ENTER after you are finished add the tag text. To remove the tag, click the to the right of the text.
- Click UPDATE SETTINGS.
- If you update the block URL you will be redirect to that URL, which is a view of the block as a page.
- Update the thumbnail.
- Drag and drop or click Browse to add an image from your computer.
- Adjust your image.
- Click UPLOAD.

Remove a Block
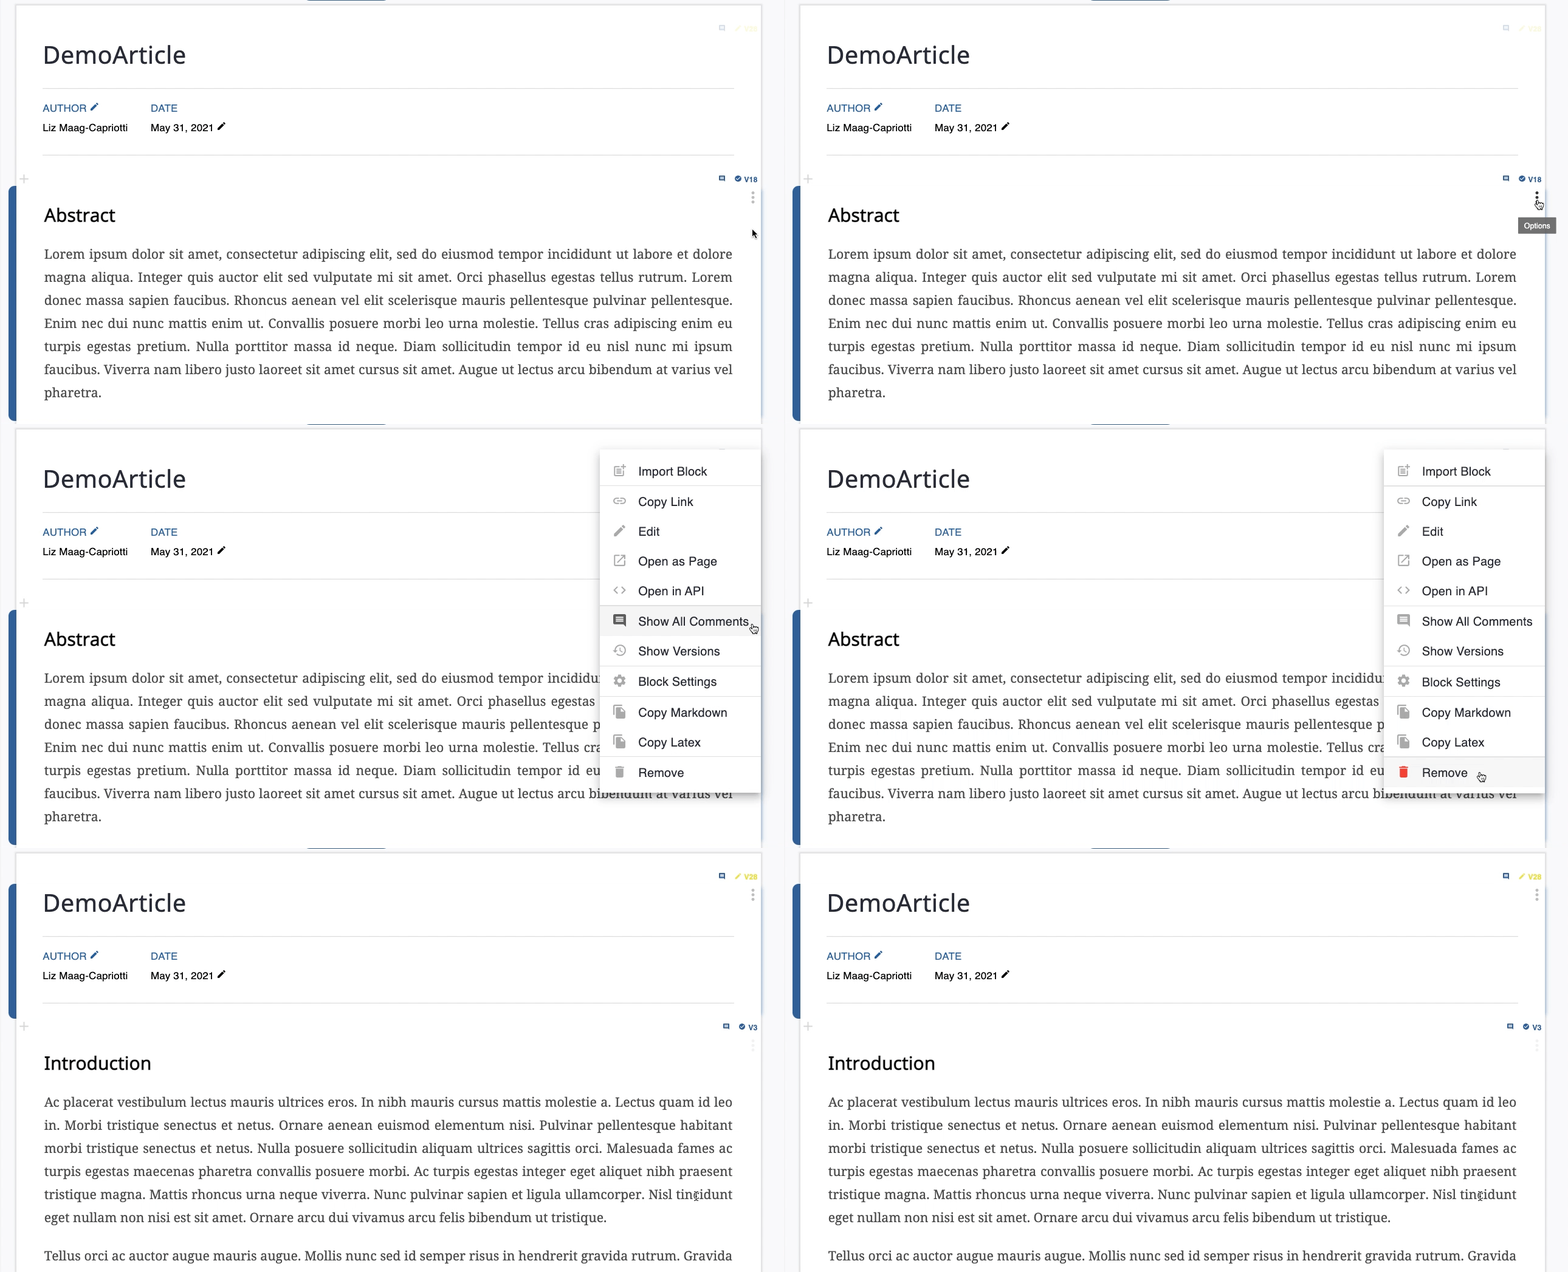
Because blocks can be reused throughout Curvenote, they are rarely deleted permanently. Blocks can be removed from an article. This will only remove the copy of the block that was in that article; other copies of the block will not be impacted. To remove a block:
- You must be in Draft Mode for your article.
- If not, click EDIT in the app bar at the top of the page.
- Open the Options menu for the block (top right of the block).
- Select 🗑️ Remove.
